
How to Install OpenMediaVault (OMV) on a Raspberry Pi Without a LAN Connection
Turning your Raspberry Pi into a home server using OpenMediaVault (OMV) is a great idea—especially when you don’t have a LAN (Ethernet) connection available. In this guide, you’ll learn how to install

🧰 What You’ll Need
Raspberry Pi (any Wi-Fi capable model)
SD card (8GB or more recommended)
A PC or laptop to prepare the SD card
A keyboard
Power supply for the Pi
A monitor (for first-time setup)
📥 Step 1: Flash Raspberry Pi OS Lite Using Raspberry Pi Imager
Download and install Raspberry Pi Imager on your PC.
Open the Imager, then:
Choose Device: Select your Raspberry Pi model.
Choose OS: Go to
Raspberry Pi OS (Other)→ select "Raspberry Pi OS Lite (32-bit)". (Lite = no desktop interface)Choose Storage: Select your SD card.
Click Next, and when prompted, choose Edit Settings.
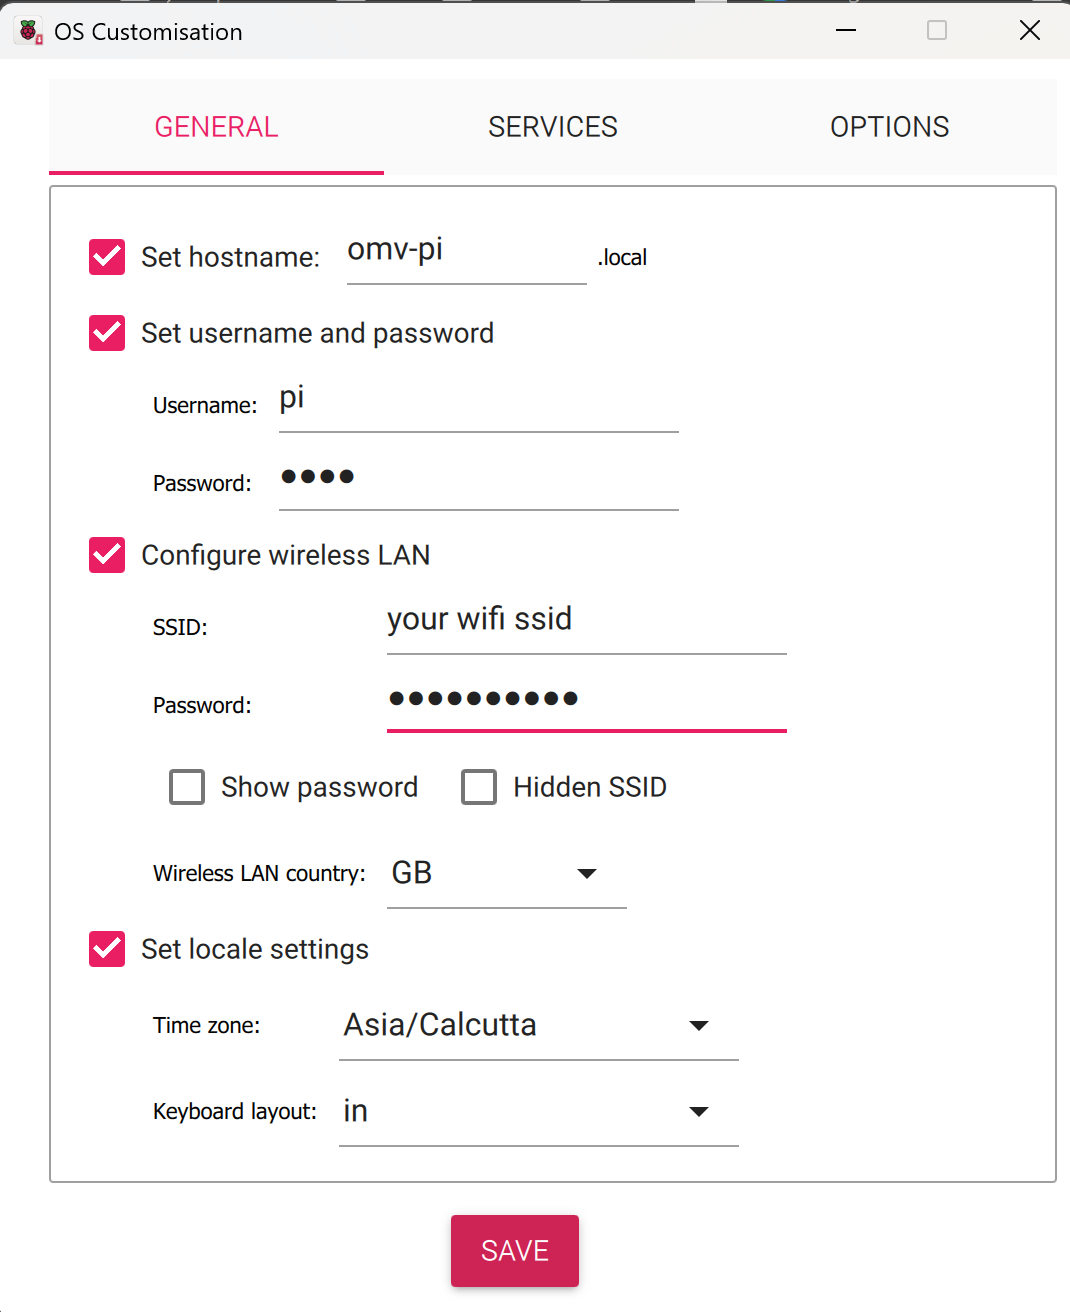
⚙️ OS Customization
In the settings window:
General Tab:
✅ Set Hostname (e.g.,
omv-pi)✅ Set Username and Password (create your own)
✅ Configure Wireless LAN (enter your Wi-Fi SSID and password)
✅ Set Locale (Time zone and keyboard layout)
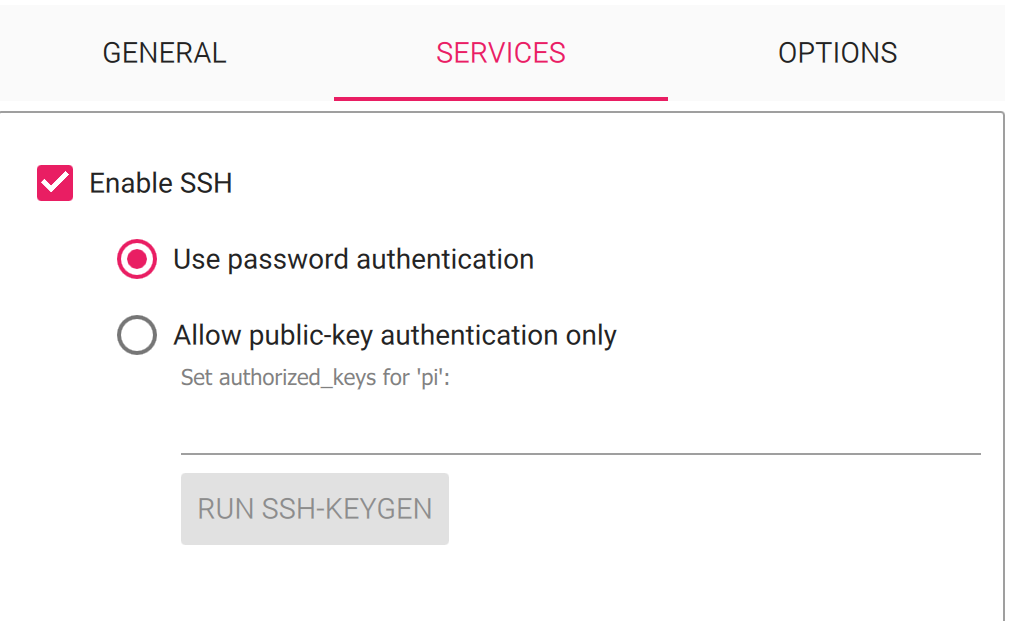
Services Tab:
✅ Enable SSH
Choose Password Authentication
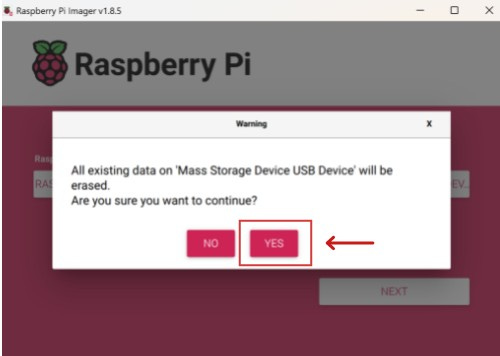
Click Save, then confirm by clicking Yes on the popup.
⚠️ The SD card will be erased. Confirm when warned.
⚡ Step 2: Boot and First Login
Eject the SD card from your PC and insert it into the Raspberry Pi.
Connect your monitor and keyboard to the Pi.
Power on the Raspberry Pi.
Once the Pi boots, log in using the credentials you set earlier.
🌐 Step 3: Check Wi-Fi Connection
Run this command:
ifconfig Look for wlan0 with an IP like 192.168.1.XX.
If you see it — great! You’re connected to Wi-Fi.
🔄 Step 4: Update the System
Run:
sudo apt updatesudo apt upgrade -y📦 Step 5: Install OMV
1. Run Preinstall Script
wget -O - https://raw.githubusercontent.com/OpenMediaVault-Plugin-Developers/installScript/master/preinstall | sudo bash2. Reboot
sudo reboot3. Run the Install Script
wget -O - https://raw.githubusercontent.com/OpenMediaVault-Plugin-Developers/installScript/master/install | sudo bashThis will take several minutes.
🛠️ Step 6: Fix Wi-Fi (If wlan0 is Missing After Reboot)
1. Bring the interface up:
sudo ip link set wlan0 up2. Create/Edit Wi-Fi Config:
sudo nano /etc/wpa_supplicant/wpa_supplicant.confPaste this into the file:
ctrl_interface=DIR=/var/run/wpa_supplicant GROUP=netdev
update_config=1
country=IN

network={
    ssid="your_wifi_ssid"
    psk="your_wifi_password"
    key_mgmt=WPA-PSK
}
Replace
INwith your country code.Replace
your_wifi_ssidandyour_wifi_passwordwith your actual Wi-Fi details.
3. Set Proper Permissions: (optional)
sudo chmod 600 /etc/wpa_supplicant/wpa_supplicant.conf4. Start Wi-Fi Connection:
sudo wpa_supplicant -B -i wlan0 -c /etc/wpa_supplicant/wpa_supplicant.conf
sudo dhclient wlan0
5. Verify Wi-Fi:
ifconfigYou should now see wlan0 with an IP address.
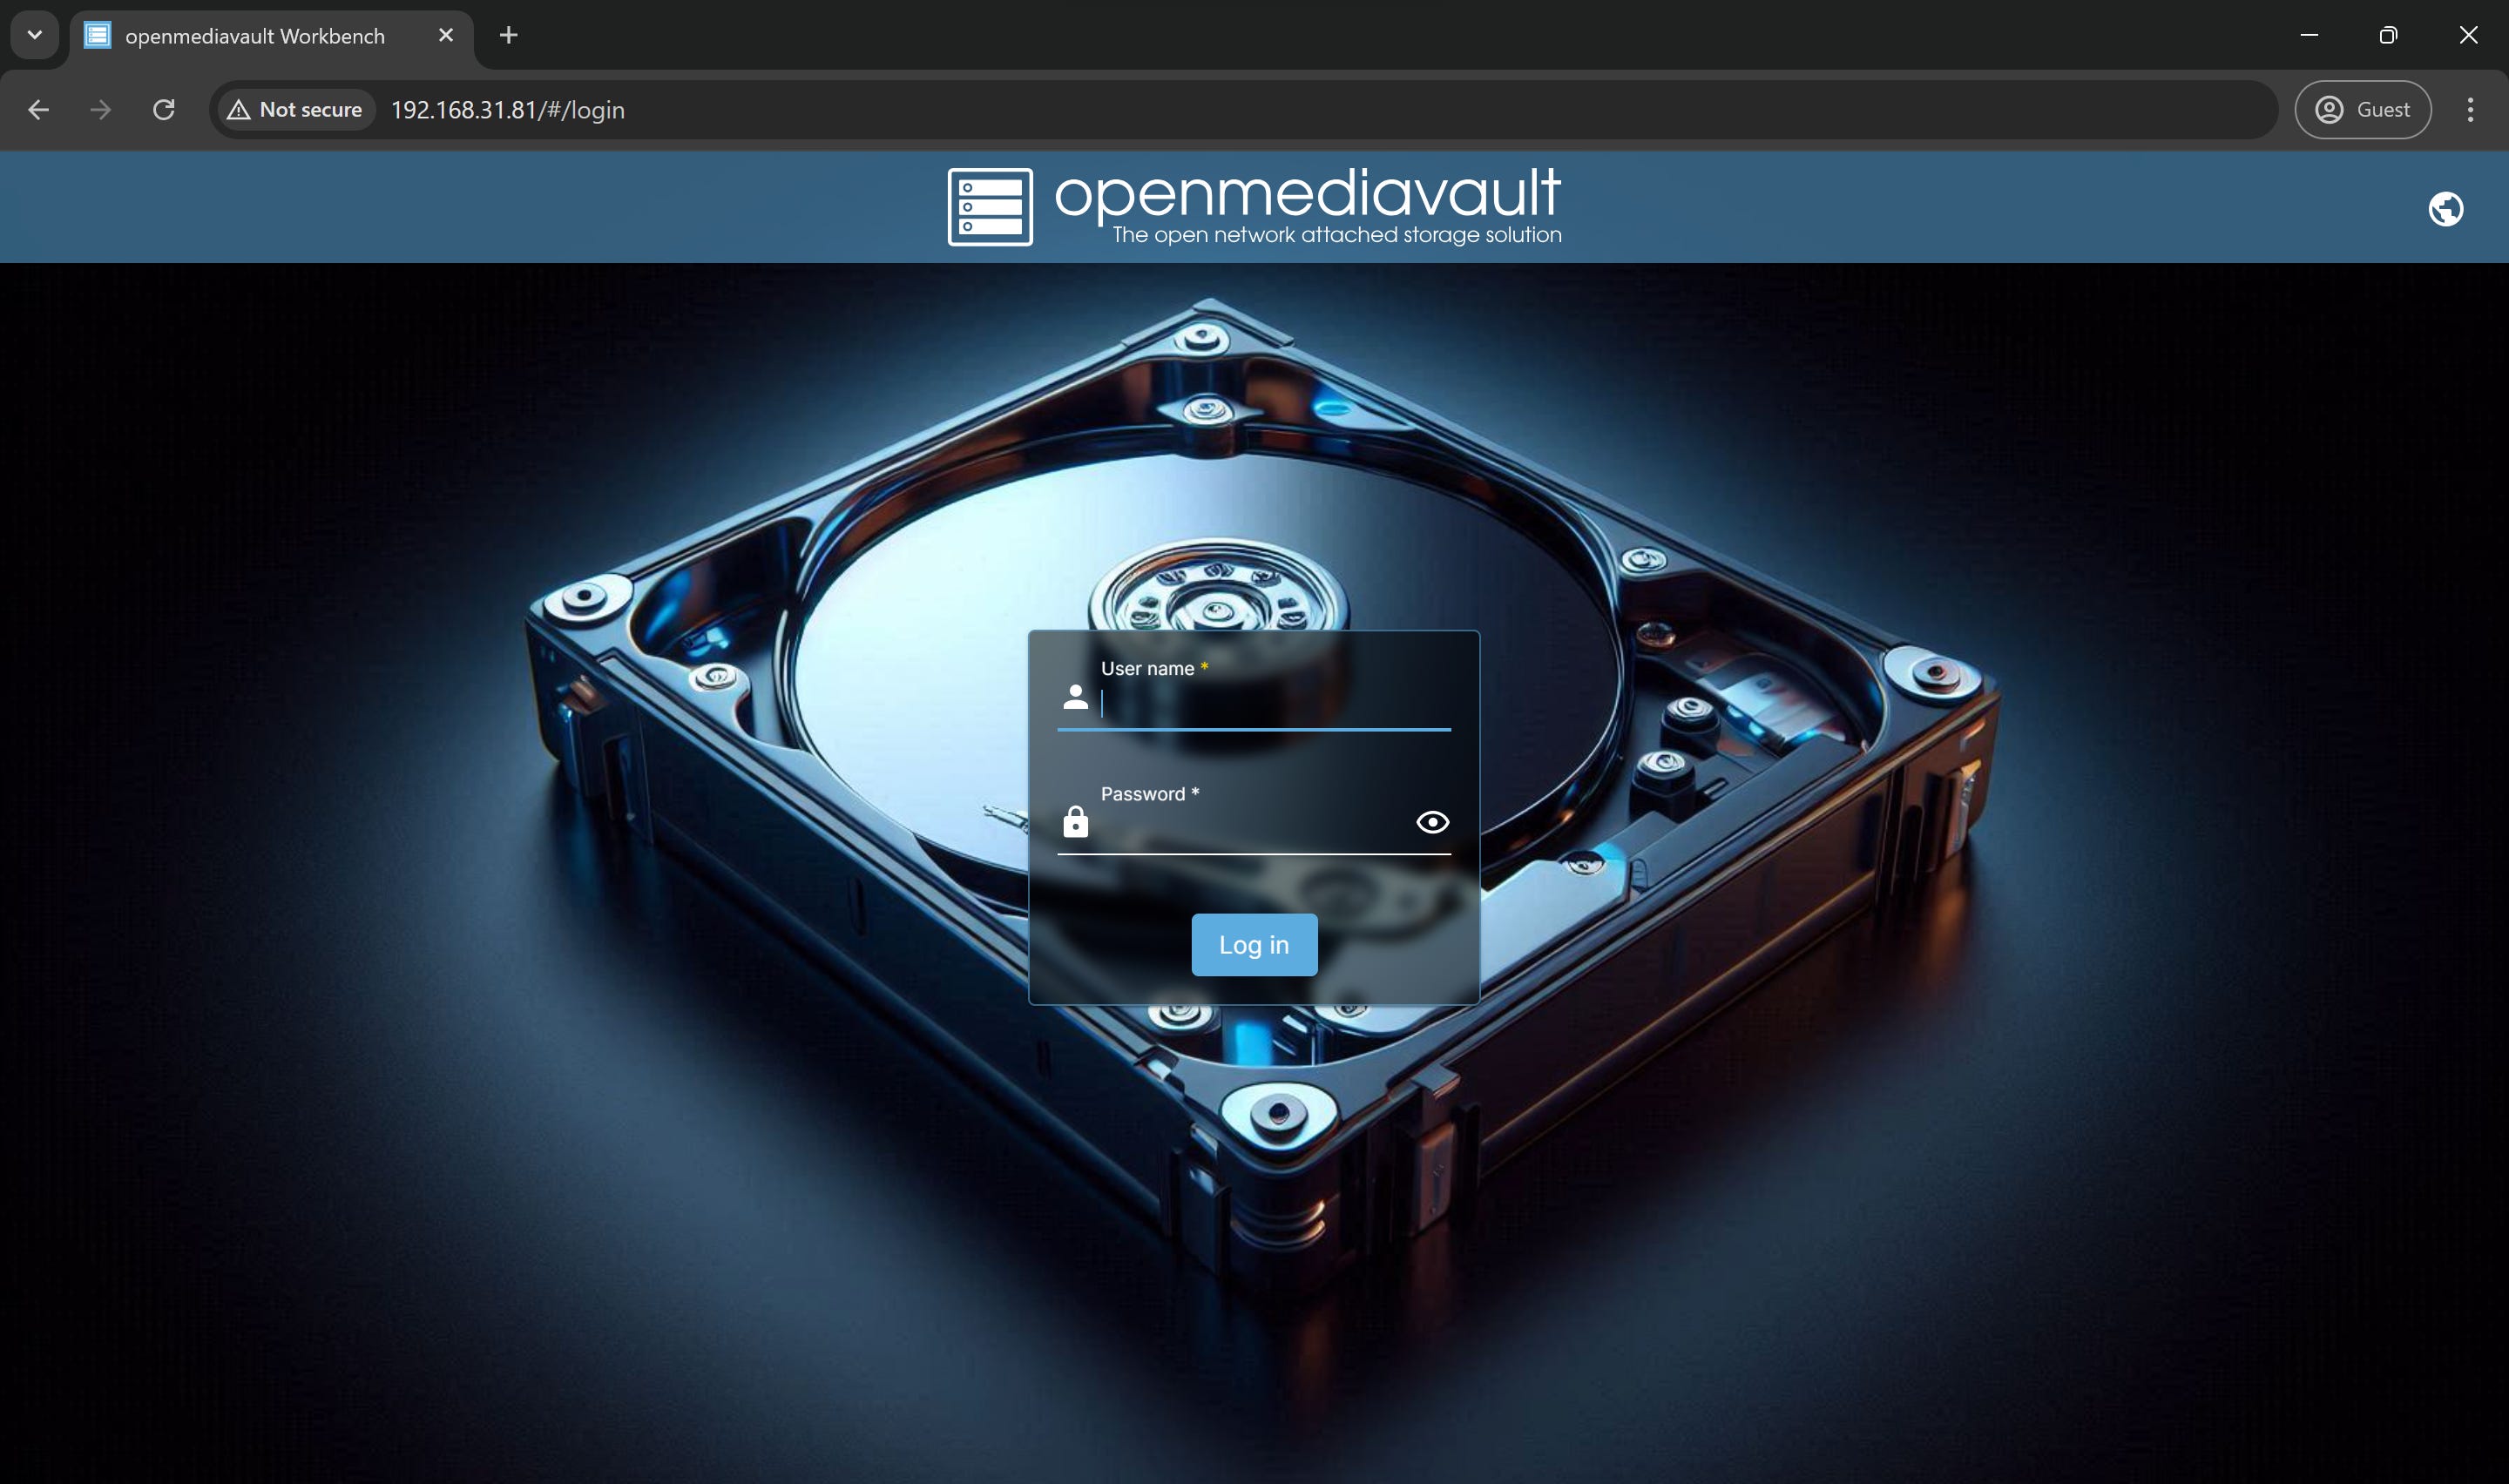
🌐 Step 7: Access OpenMediaVault in Browser
On your PC browser, open the Pi’s IP address
Example:
http://192.168.1.81
Login using:
Username:
adminPassword:
openmediavault
🔧 Step 8: Configure Wi-Fi Inside OMV (Optional but Recommended)
Go to:
Network→Interfaces→ click Add → choose Wi-FiEnter your Wi-Fi SSID and password.
Click Save and wait for the settings to apply.
It might take a minute or two—be patient.
🔁 Step 9: Final Reboot
Reboot the Pi:
sudo rebootWait for OMV to fully start (this can take 2–3 minutes).
Then go back to your browser and access the OMV dashboard using the IP.
✅ You’re Done!
Now your Raspberry Pi is running OpenMediaVault completely over Wi-Fi—no Ethernet cable needed.
If this guide helped you, feel free to share it with others. You’ve just set up a powerful home server using only a few tools! 🎉